Vanity Area Before and After
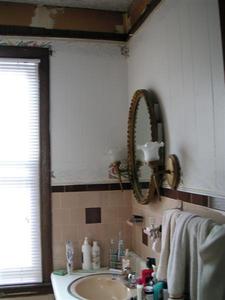 Notice the lovely flesh colored tile work. Above, you can see where the old drop ceiling was - we took that down 3 years ago. The vanity mirror was a true gem. Many folks wanted it when we were doing the demolition, but unfortunately, it did not survive the process. The light fixtures were also very special to us. Others weren't so keen on them, particularly the way they were switched on and off the past year - (un)screw the bulbs. C'mon people, what's the problem?!
|
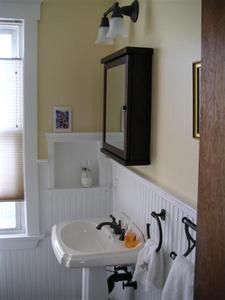 Now that's a place to shave in the morning! A nice, new pedestal sink with oil-rubbed bronze fixtures. A handsome medicine cabinet with good storage. A sweet looking light fixture. Some matching towel bars and hook. And check out that cool sink-side cubby. See how its trim matches the adjacent window. That's what I'm talkin' about!
|
Sink Before and After
 Ahh yes, the mammoth vanity from Hell. Way too big for this tiny bathroom. Dig that floor? Hope you like brown. You might be wondering if we had any electrical outlets. Sure did. One. It was integrated into the mirror unit. The 70s were a time of such great innovations.
|
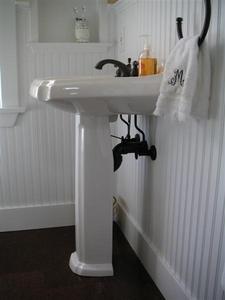 Clean lines. Clean sink! Clean everything! Finding sink supply and drain hardware to match our other oil-rubbed bronze fixtures took a little work. We found the supply lines. The drain and P-trap are actually PVC spray painted to match. Hey, is that a GFCI receptacle? Why, yes indeed, it is. Safety first!
|
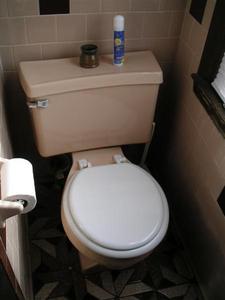
Toilet Before and After
 More flesh colored crap.
|
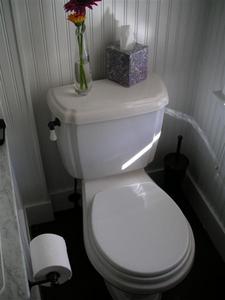 Thomas Crapper would be proud of this one! Hey, is that the same roll of TP?
You can't really see it in this photo, but the flooring is worth mentioning. We put down a cork floor. The cork comes as 12" square, 1/8" thick natural cork tiles. The tiles go down fairly easily with contact cement. After that, the whole floor is coated several times with polyurethane, just like any other wood floor. The nice part about the cork is that it is warm, unlike ceramic tile. Perfect for those chilly winter mornings. |
Tub/Shower Before and After
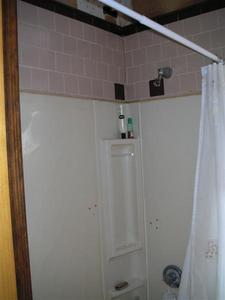 A good ol' plastic shower surround glued over the tile that preceded it. You should have seen the shower seat we found when we moved in. EEEWWWWW.
|
 I'll let this one speak for itself.
|
Toilet Paper Holder, etc.
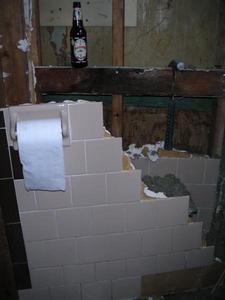 Well, not really "Before," more like in progress. Sort of a gratuitous photo showing an intact section of wall with tile and the toilet paper holder still proudly doing its job. The beer in the background was one of many fallen soldiers.
|
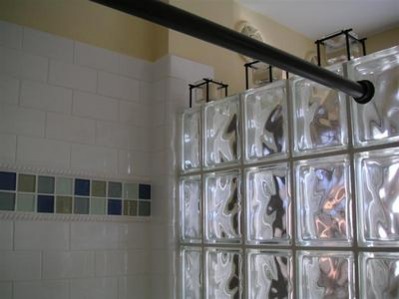
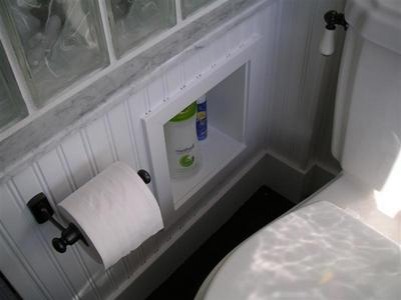 Damn, this guy is good. A nifty little cubby built-in to the base of the glass block wall. A perfect place for supplies, TP, or anything else that one might need while in the loo. Like a fragrant air deodorizer.
|